Quick Troubleshooting for Horizontal Machining Center Table Faults: 3-Step Method to Troubleshoot Table Failure to Lift/Rotate/Inaccurate Indexing, Reducing Downtime by 80%
In the production process of horizontal machining centers, table failure to lift, rotate, or index are the core faults that frequently cause downtime, reducing equipment productivity and increasing rework and overtime costs. This article focuses on these three high-frequency problems, providing a 3-step quick troubleshooting method, along with a fault quick reference table, practical steps, and a long-term maintenance plan, to help you locate the root cause of the problem within 15 minutes, ultimately reducing downtime by 80% and minimizing unnecessary productivity losses.
Are you troubled by problems such as the table suddenly failing to lift, no response after starting the rotation command, or excessively low accuracy after indexing? These malfunctions don't always require professional maintenance personnel—their root causes often lie in easily diagnosable areas such as insufficient hydraulic pressure, loose couplings, and excessive gear clearance. This article's 3-step troubleshooting method requires no complex tools, quickly pinpointing the problem and providing corresponding solutions, helping you skip the "waiting for repairs" window and rapidly restore production.
More importantly, the article not only provides detailed step-by-step instructions for each type of malfunction but also includes a real-world case study of a machinery factory that used this method to reduce daily downtime from 2 hours to 15 minutes. The article also includes downloadable toolkits such as a "Quick Troubleshooting Checklist" and a "Maintenance Checklist." Continue reading to master a complete workbench management strategy, from "rapid troubleshooting" to "long-term prevention," making equipment operation more stable and production capacity more controllable.
I. First, understand the fatal impact of three major workbench malfunctions (with supporting data)
1. Workbench fails to lift: Clamping interruption, single downtime ≥ 30 minutes
Problem manifestations: No action after triggering the lift command, lift stalls (only moves 1-2mm and then stops), or fails to lock after lifting;
Production loss: A single machine experiences an average of 45 minutes of downtime per day due to this malfunction, resulting in a monthly reduction of approximately 180 pieces of production capacity (calculated at 20 minutes per piece);
Cost consequences: A certain auto parts factory experiences 3.5 hours of downtime per week due to workbench failure, incurring an additional monthly overtime pay of 12,000 yuan and rework parts losses exceeding 8,000 yuan.
2. Worktable Not Rotating: Multi-faceted Machining Jams, Complete Process Halt
Problem Description: After inputting rotation commands (e.g., B-axis M code), the worktable does not respond, accompanied by abnormal noises, or the rotation angle is insufficient (e.g., only 60° is rotated when 90° is required);
Chain Consequences: Clamped workpieces must be disassembled and reassembled, increasing rework time by 50%; multi-faceted machining of box and shell types cannot proceed, causing the entire production line to wait;
Case Loss: A mold factory was machining a 6-sided part when the worktable suddenly stopped rotating, resulting in the scrapping of 15 workpieces and a direct loss exceeding 20,000 yuan.
3. Inaccurate Indexing: Precision deviations exceed tolerances, leading to a surge in scrap rates.
Problem Manifestations: After indexing, the coaxiality of hole positions and the perpendicularity of surfaces on parts exceed tolerances (e.g., a 90° indexing deviation of 0.01mm), and the repeatability error is >0.005mm.
Quality Risks: The scrap rate jumps from 2% to 15%, with the value of scrapped high-precision parts (such as core components for aerospace and automotive parts) exceeding 50,000 RMB.
Efficiency Impact: Average daily downtime due to calibration is 1.5 hours, reducing equipment utilization from 85% to 60%.

II. Core Solution: 3-Step Quick Troubleshooting Method for 3 Major Faults (Practical and Implementable)
1. Workbench Won't Lift: 3 Steps to Locate Hydraulic/Mechanical/Electrical Problems
Step 1: Prioritize Hydraulic System Inspection (80% of Fault Root Causes)
Required Tools: Pressure gauge, flashlight (No specialized equipment required)
Operating Steps:
Check Hydraulic Station Pressure: Normal value 3.5-4MPa. If below 3MPa, adjust the relief valve; if there is no pressure, check if the hydraulic pump power is on and if the pump body is faulty;
Check Oil Circuit Status: Use a flashlight to check for leaks at the lifting oil circuit joints and whether the oil circuit shut-off valve is in the "open" position (incorrectly closing it will cause the oil circuit to be blocked);
Test Cylinder Movement: Manually trigger the cylinder solenoid valve inside the PLC cabinet and observe whether the cylinder extends or retracts (if there is no movement, it is highly likely that the cylinder seal is damaged or there is air accumulation in the oil circuit).
Step 2: Inspect the Mechanical Lifting Structure
Operating Steps:
* Clean the lifting guide rails: Use compressed air (0.4MPa) to blow away chips and impurities. Check the guide rails for scratches (scratches can cause jamming; temporarily apply guide rail oil to alleviate this).
* Confirm the locking mechanism: Before raising the worktable, loosen the locking cylinder. Check if the "Locked Status" on the system interface is "Released." If not, re-trigger the release command (e.g., M code).
Step 3: Verify Electrical Signals (PLC/I/O)
Operating Steps:
* Check PLC Inputs: In the CNC system diagnostic interface, confirm that the "Worktable Lift Request" signal is "ON" (if not triggered, check if the control panel buttons and foot switch are faulty).
* Check PLC Outputs: Confirm that the "Hydraulic Cylinder Solenoid Valve" output is "ON" (if there is no output, check if the relay and wiring terminals are loose or burnt).
Quick Check Conclusions:
Insufficient hydraulic pressure → Adjust the relief valve; No cylinder movement → Replace the seal ring; Missing signal → Restart the PLC or replace the button.
2. Worktable Not Rotating: 3 Steps to Troubleshoot Drive/Transmission/Lubrication Issues
Step 1: Troubleshoot the Rotary Drive System
Required Tools: Multimeter, Motor Ammeter
Steps:
Check Motor Power Supply: Use a multimeter to measure the rotary motor terminals to confirm a stable three-phase 380V voltage (if one phase is missing, check the circuit breaker and contactor for damage);
Check Motor Load: Start the rotation command and observe the ammeter display. If it exceeds 120% of the rated value, the motor is overloaded (often caused by mechanical jamming).
Step 2: Check the Transmission Mechanism
Steps:
Check Gearbox: Open the inspection window and check if the gear meshing is normal, and for any broken teeth or severe tooth wear (broken teeth require temporary replacement with a spare gear);
Tighten Couplings: Confirm that the coupling between the motor and the drive shaft is not loose, and tighten it to 50 N·m with a torque wrench (loose couplings will prevent power transmission);
Check Rotary Guide Rails: Check if the guide rails are jammed with chips. Manually push the worktable (without power) to determine if it moves smoothly.
Step 3: Confirm Lubrication Status
Operating Steps:
Check the lubrication system: Check if the oil mist lubricator is spraying oil normally and if the lubricating oil level is up to standard (if no oil is spraying, add lubricating oil and increase the oil mist output);
Manual auxiliary test: After disconnecting the power, use a wrench to rotate the drive shaft. If it is stuck, apply high-temperature grease (such as SKF LGMT 3) to temporarily relieve the problem.
Quick Check Conclusion:
Motor phase loss → Replace circuit breaker;
Loose coupling → Tighten;
Insufficient lubrication → Add oil and clean any stuck guide rails.
3. Inaccurate Table Indexing: 3-Step Positioning Gear / Encoder / Thermal Deformation Issues
Step 1: Check the Gear Clearance (Core Influencing Factor)
Required Tools: Feeler gauge, dial indicator
Operating Steps:
* Measure the meshing clearance: Use a feeler gauge to measure the gear clearance. Normal value ≤ 0.002mm. If it exceeds this tolerance, adjust it using the gear locking bolts (tighten 1/4 turn each time, gradually calibrating);
* Clean the gear surface: Use a brush to remove chips and oil stains from the tooth surface (residual impurities can cause indexing jamming and uneven clearance).
Step 2: Verify Encoder Accuracy
Operating Steps:
* View feedback data: View the encoder indexing feedback value on the system interface. If the feedback deviation after 90° indexing is > 0.003mm → reset the encoder zero point;
* Check hardware status: Confirm that the encoder plug is not loose and the wiring is not damaged (if loose, re-plug and tighten; if damaged, replace the wiring).
Step 3: Eliminate the Influence of Thermal Deformation
Operating Procedure:
Measure the worktable temperature: Use an infrared thermometer to check the temperature of the gear plate and rotary guide area. If >40℃, turn on the worktable cooling system (constant temperature 22±1℃);
Temporary thermal compensation: Input the graduation compensation value into the system (e.g., actual deviation 0.008mm, compensation -0.007mm), and recalibrate after the temperature stabilizes.
Quick Check Conclusion:
Large gear plate clearance → Adjust bolts;
Encoder deviation → Reset zero point;
Thermal deformation → Turn on cooling + temporary compensation.
III. Post-Troubleshooting: Fault Verification + Emergency Production Techniques (Avoiding Prolonged Downtime)
1. Fault Verification: 2-Step Quick Confirmation
Step 1: Manual Testing: After troubleshooting, trigger the faulty action three times consecutively (e.g., lift → lower → lift, index → reset → index) to confirm stable operation without jamming;
Step 2: Trial Cut Verification: Process one standard test piece (e.g., a 100×100×50mm block), measure key dimensions (indexing perpendicularity, positioning accuracy), and resume mass production after passing the test.
2. Emergency Production Techniques
**Worktable Not Lifting:** In case of hydraulic cylinder failure, a manual hoist can be used to assist in lifting (only applicable to small workpieces ≤50kg, to avoid damaging the guide rails);
**Worktable Not Rotating:** In case of minor gearbox malfunction, process only one side of the part first, and then thoroughly repair it after the shift change;
**Indication Inaccuracy:** When the gearbox clearance is out of tolerance and there is no time to adjust it, prioritize processing parts with lower precision requirements, and record the deviation value for later compensation;
**Note:** After emergency operation, a thorough repair must be completed within 12 hours to prevent the malfunction from worsening.
IV. Long-Term Prevention: Workbench Maintenance Checklist (Reduces Fault Recurrence by 70%)
1. Daily Maintenance (5 minutes/day)
✅ Check hydraulic station oil level (maintain oil level at 1/2-2/3 of the sight glass; add hydraulic oil if insufficient);
✅ Use compressed air to blow away chips and impurities from the workbench guide rails and gear plate surface;
✅ Confirm that the cooling and lubrication systems are functioning correctly (preheat for 5 minutes before processing);
✅ Test the workbench lifting, rotating, and indexing actions once each; only put it into production if no abnormalities are found.
2. Weekly Maintenance (30 minutes/week)
✅ Measure the indexing gear plate clearance with a feeler gauge and record the data (adjust promptly if it exceeds 0.002mm);
✅ Check the coupling tightening torque (standard 50N·m); tighten if loose;
✅ Add guide rail oil and gearbox oil (select manufacturer's recommended model according to the oil level mark);
✅ Clean the hydraulic oil filter element to prevent oil circuit blockage.
3. Monthly Maintenance (1 hour/month)
✅ Measure the repeatability error of the worktable rotation using a dial indicator (≤0.003mm);
✅ Replace the hydraulic oil filter and lubrication system filter;
✅ Calibrate the encoder zero point and record the calibration data;
✅ Check for leaks in the cylinder seals and rotary joints; replace if aged.
V. Case Study: A Machinery Factory Reduces Downtime by 85% Using a 3-Step Troubleshooting Method
1. Original Problem
Equipment: 2 horizontal machining centers (FANUC system), mainly processing gearbox housings;
Core Fault: The worktable experienced an average of 2 hours of downtime per day due to "not rotating + inaccurate indexing";
Losses: Monthly production loss of 480 pieces, rework costs of 18,000 yuan, and equipment utilization rate of only 60%.
2. Troubleshooting and Optimization Process
Worktable Not Rotating: Following the 3-step troubleshooting method, a loose coupling was found (torque only 30 N·m). After tightening to 50 N·m, normal rotation was restored;
Inaccurate Indexing: The gear clearance was measured at 0.004 mm. It was adjusted to 0.0015 mm by tightening the locking bolts, and the encoder zero point was reset;
Implementation Maintenance Plan: A daily/weekly/monthly maintenance checklist was implemented. Daily cleaning of chips and checking of oil levels were performed, and weekly measurement of gear clearance was conducted.
3. Optimization Results
Downtime: Reduced from 2 hours/day to 15 minutes/day, an 85% reduction;
Production Capacity Increase: Monthly production capacity increased by 420 units, directly increasing revenue by 63,000 yuan;
Cost Reduction: Rework costs decreased from 18,000 yuan/month to 2,000 yuan/month;
Fault Recurrence Rate: Reduced from 3 times per week to once per month.
FAQ: Common Problems in Troubleshooting Workbench
Q: Can I do basic troubleshooting without professional tools?
A: Yes! Use a flashlight to check for oil leaks and chip residue; manually rotate the drive shaft with a wrench to check for jamming; use a mobile phone infrared thermometer to measure temperature. This can complete 80% of basic troubleshooting without professional equipment.
Q: Can I adjust the indexing gear clearance myself?
A: Yes! Steps: ① Loosen the locking bolts around the gear plate; ② Use a feeler gauge to measure the gear plate clearance; ③ Tighten the bolts evenly (1/4 turn each time), repeating the measurement until the clearance is ≤0.002mm. The operation is simple and has no learning curve.
Q: The hydraulic pressure is normal, but the worktable still won't lift. What should I do? A: This is most likely due to air accumulation in the oil circuit or a damaged cylinder seal. Temporary solution: Gently tap the cylinder body with a rubber mallet (vibration to expel air); Long-term solution: Replace the cylinder seal (it is recommended that this be done by a professional after the machine is stopped to avoid hydraulic oil leakage).
Q: The worktable indexing is inaccurate. Restarting the machine temporarily restores the accuracy, but it recurs after a while. How should I handle this? A: The core issues are thermal deformation or insufficient lubrication. Recommendations: ① Turn on the worktable constant temperature cooling system; ② Increase the lubrication frequency (replenish guide rail oil daily); ③ Calibrate the encoder zero point once a month to solve the problem at its root.
Conclusion
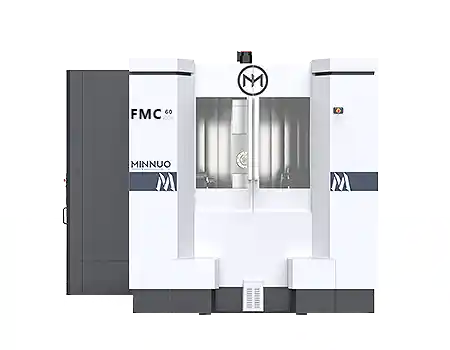
The core logic of workbench troubleshooting is "easy first, difficult later; critical first, secondary later." Through a closed loop of "troubleshooting → verification → maintenance," downtime can be effectively reduced by 80%, and maintenance costs lowered. The MINNUO horizontal machining center's workbench is designed with enhanced fault controllability from the outset: its standard high-precision indexing gear (factory clearance ≤0.0015mm), intelligent hydraulic pressure monitoring module, and maintenance-free coupling significantly reduce the incidence of hydraulic, gear, and transmission-related failures, making this troubleshooting and maintenance strategy more stable and sustainable.
To help workshops quickly implement these methods, we have compiled practical tools such as the "Fault Quick Lookup Table" and "Maintenance Checklist." MINNUO customers can also obtain the brand's exclusive "Workbench Fault Adaptation Guide." This guide is customized based on the specific parameters of MINNUO equipment (such as rated hydraulic system pressure and coupling torque standards), precisely matching the steps in the toolkit to the actual operating conditions of the equipment. No additional adjustments are needed, further simplifying the troubleshooting and maintenance process and allowing even beginners to efficiently manage workbenches.
If you are implementing long-term management of workbench malfunctions, you can begin checking oil levels and performing motion tests today, implementing the weekly maintenance checklist. During this process, MINNUO's professional technical team can provide free workbench status diagnostics to help you refine your maintenance plan within one month, keeping daily downtime below 15 minutes and increasing equipment utilization to over 85%—MINNUO will be your backbone for stable production, helping your workshop achieve efficient and low-failure operation.
 Email
Email sales1: +86 15312799623